1.注册azure的海外版帐号(需要带外币的信用卡)
2.新建虚拟机
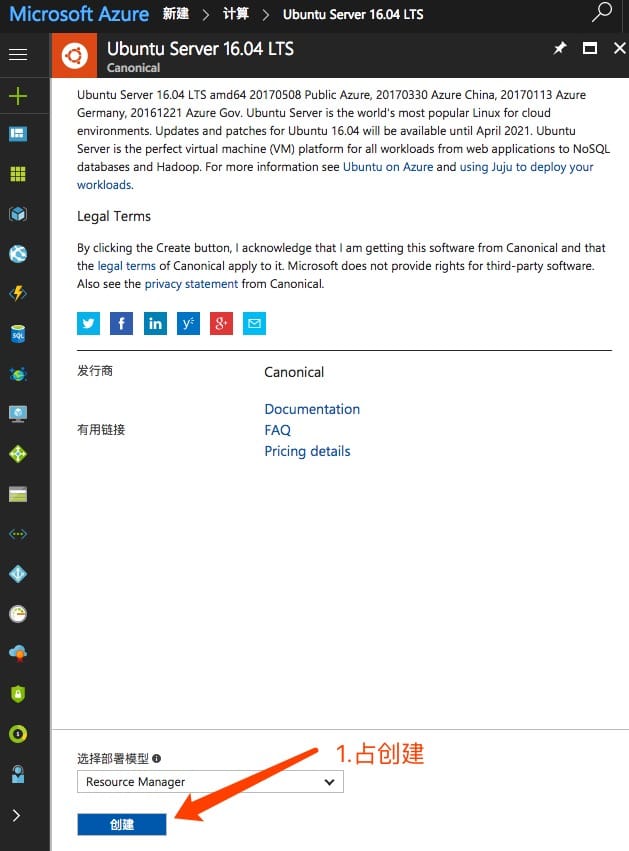
新建

创建
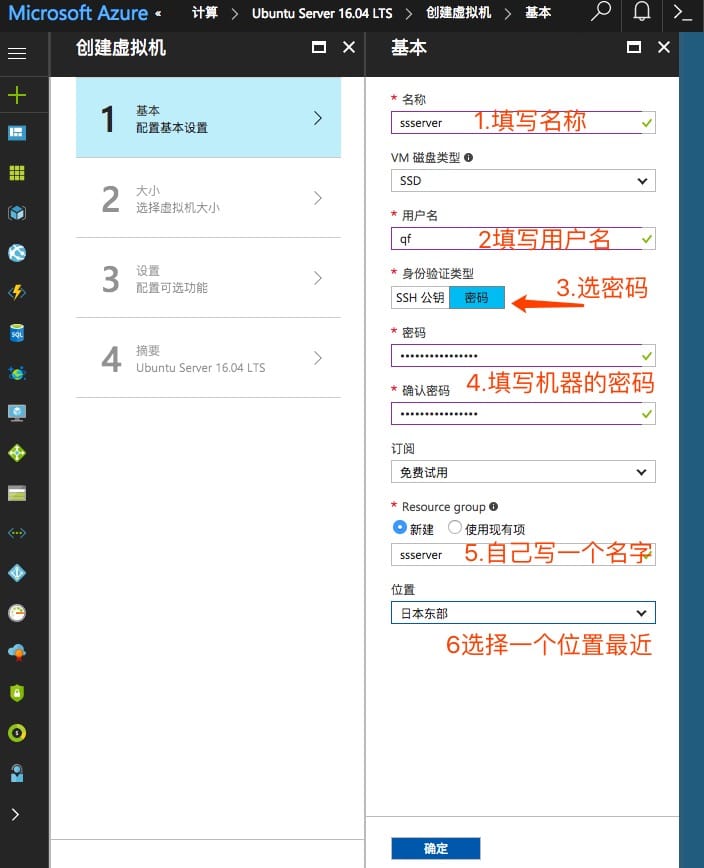
填写资料,可以先日本,也可以选东亚
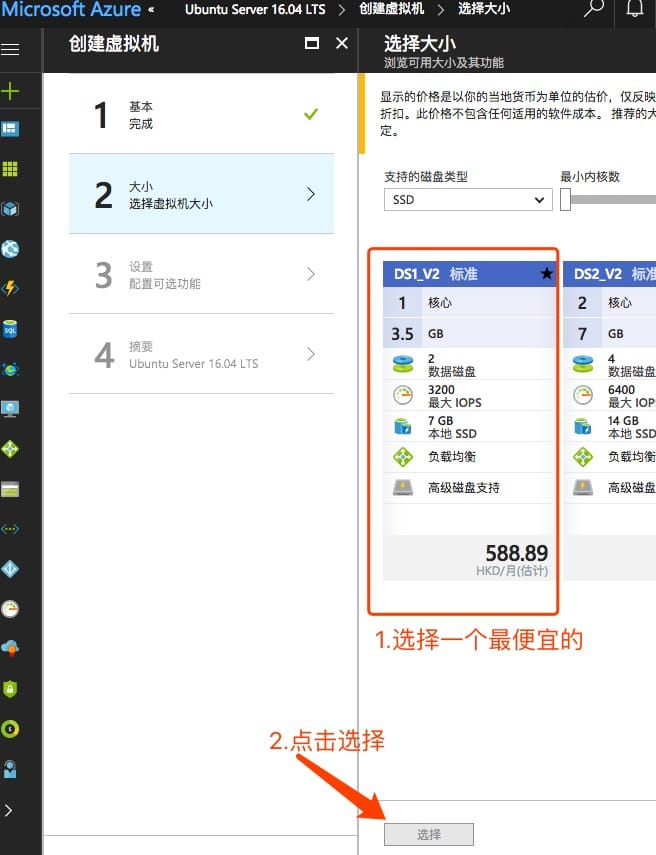
选择机器的配置,最便宜的都有一点小贵
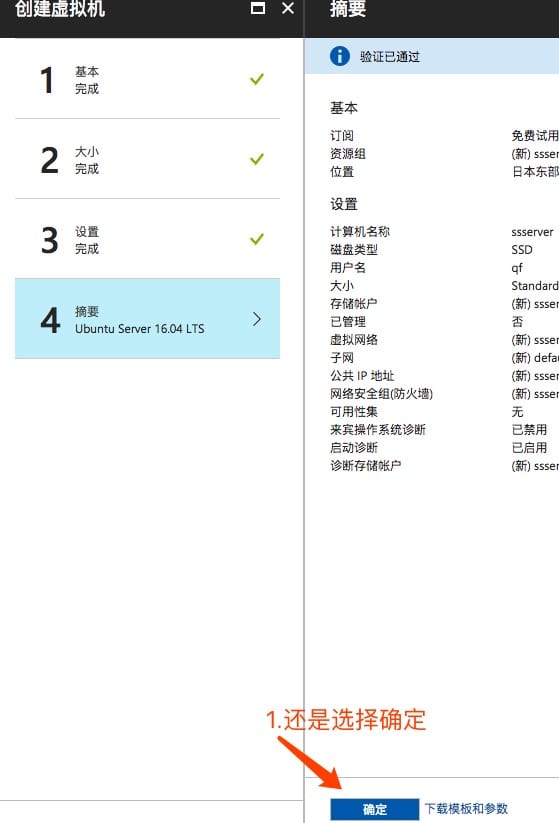
点确定
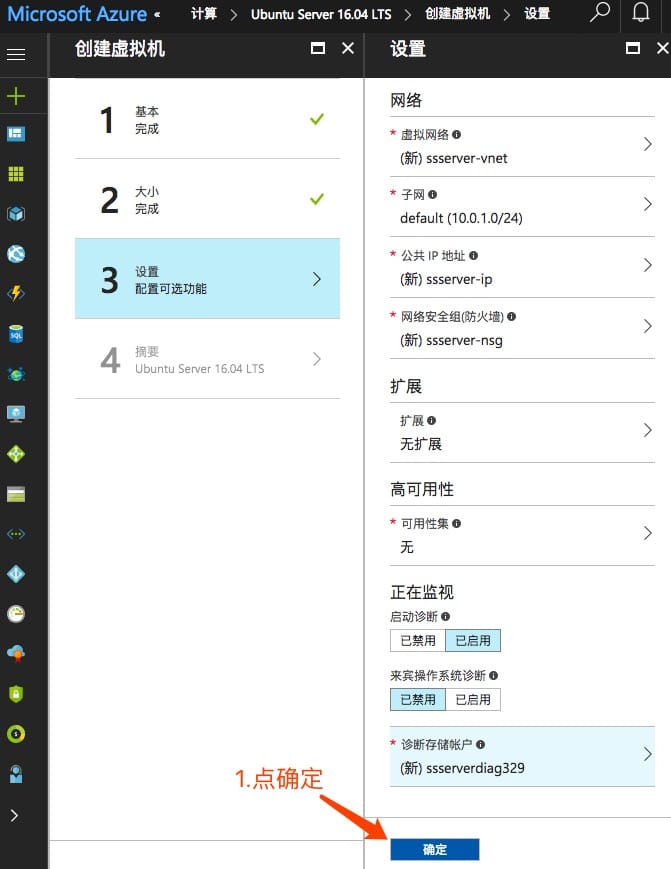
继续确定
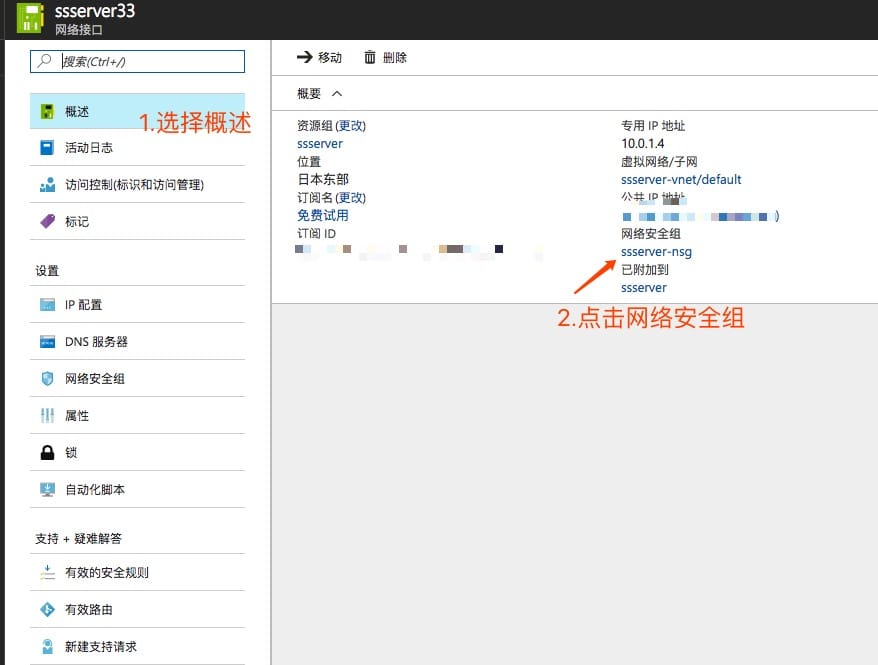
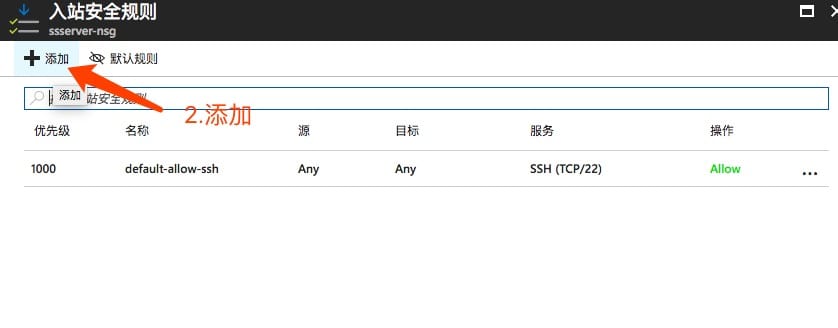
3.安装完毕,需要开放443端口
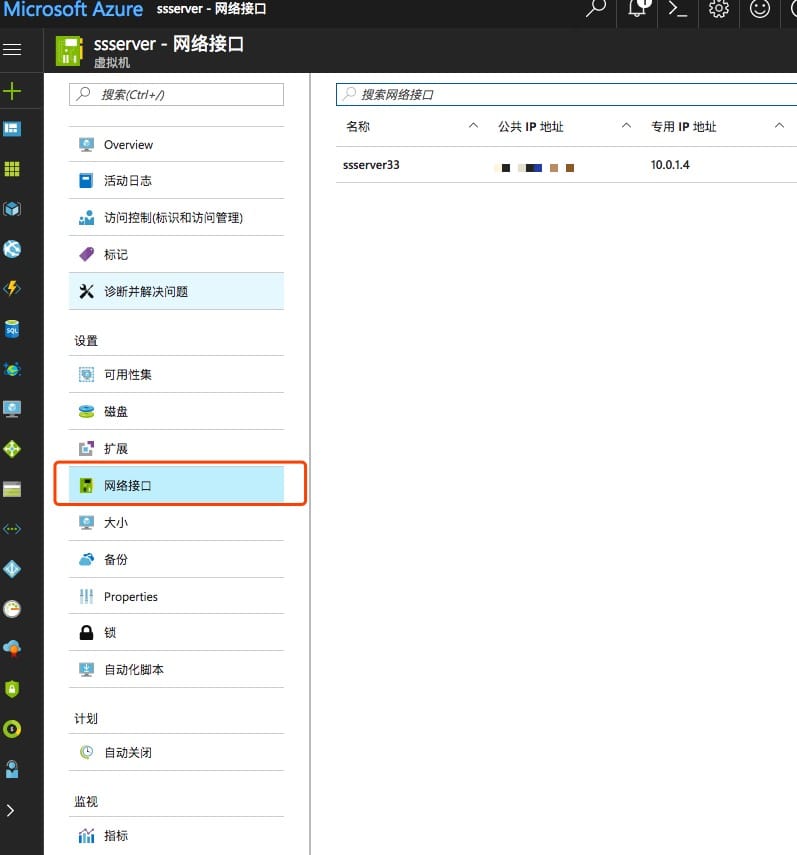
点击网络安装组
添加入站安全规则
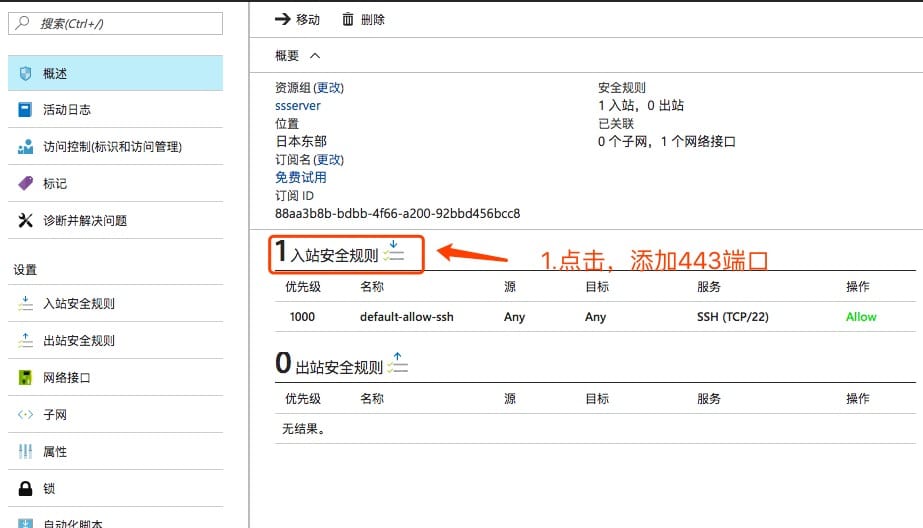
点添加
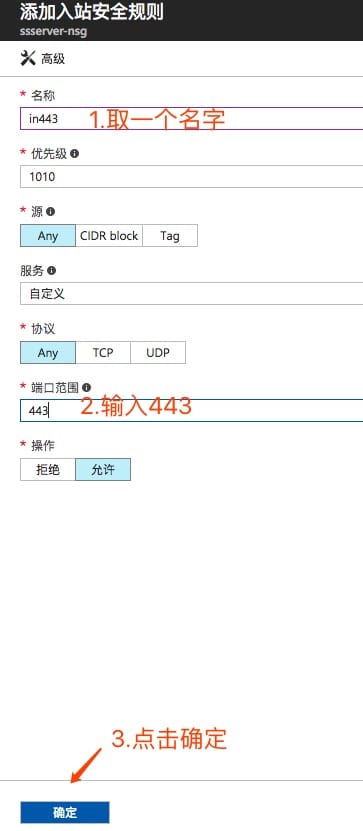
添加443的入站规则
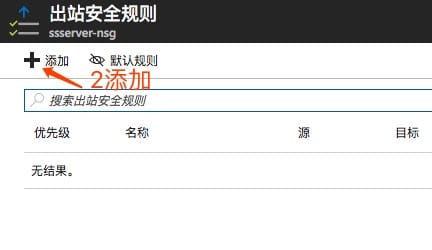
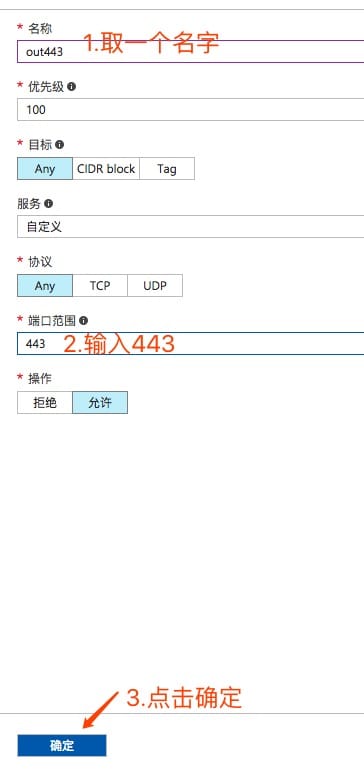
添加443端口的出站规则

4.安装ss服务
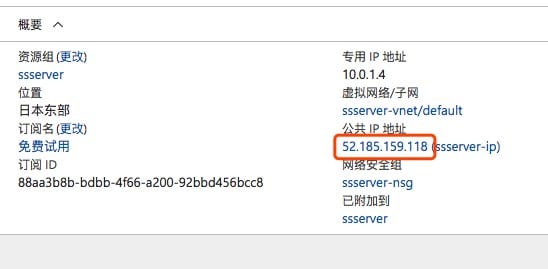
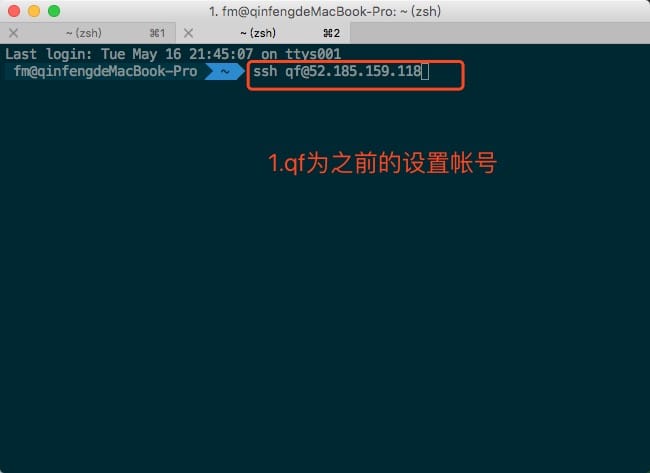
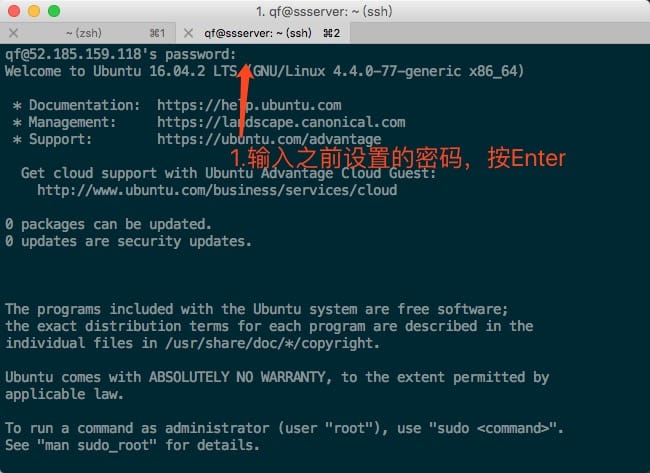
在终端中输入 ‘ssh qf@52.185.159.118‘
在终端中输入 ‘ssh qf@52.185.159.118‘
-
建立root密码,
sudo passwd -
安装ss服务
su输入密码,不会显示
sudo apt-get updatesudo apt-get install -y python-pipexport LC_ALL=Csudo pip install shadowsockssudo pip install --upgrade pipsudo apt-get install -y python-m2cryptopassword修改成自己的
cat >>/etc/shadowsocks.json<<EOF
{
"server":"0.0.0.0",
"server_port":443,
"local_address": "127.0.0.1",
"local_port":1080,
"password":"woaibeijintiananmen",
"timeout":300,
"method":"aes-256-cfb"
}
EOF
sudo chmod 755 /etc/shadowsocks.jsoncat >>/etc/rc.local<<EOF
/usr/local/bin/ssserver –c /etc/shadowsocks.json
EOF
sudo ssserver -c /etc/shadowsocks.json -d start